Scipion GUI
This page aims to introduce you in the usage of Scipion GUI. To start
image processing in Scipion we need to run scipion from the command
line. At first projects manager is displayed and we can create a new
project or select one previously registered (Fig. 1).

Fig. 1 Figure 1. Create a new project
Once a project has been selected or a new one is created, the project window will open with its content. In case of being a new one, the window will display an empty project like the one in the following figure.
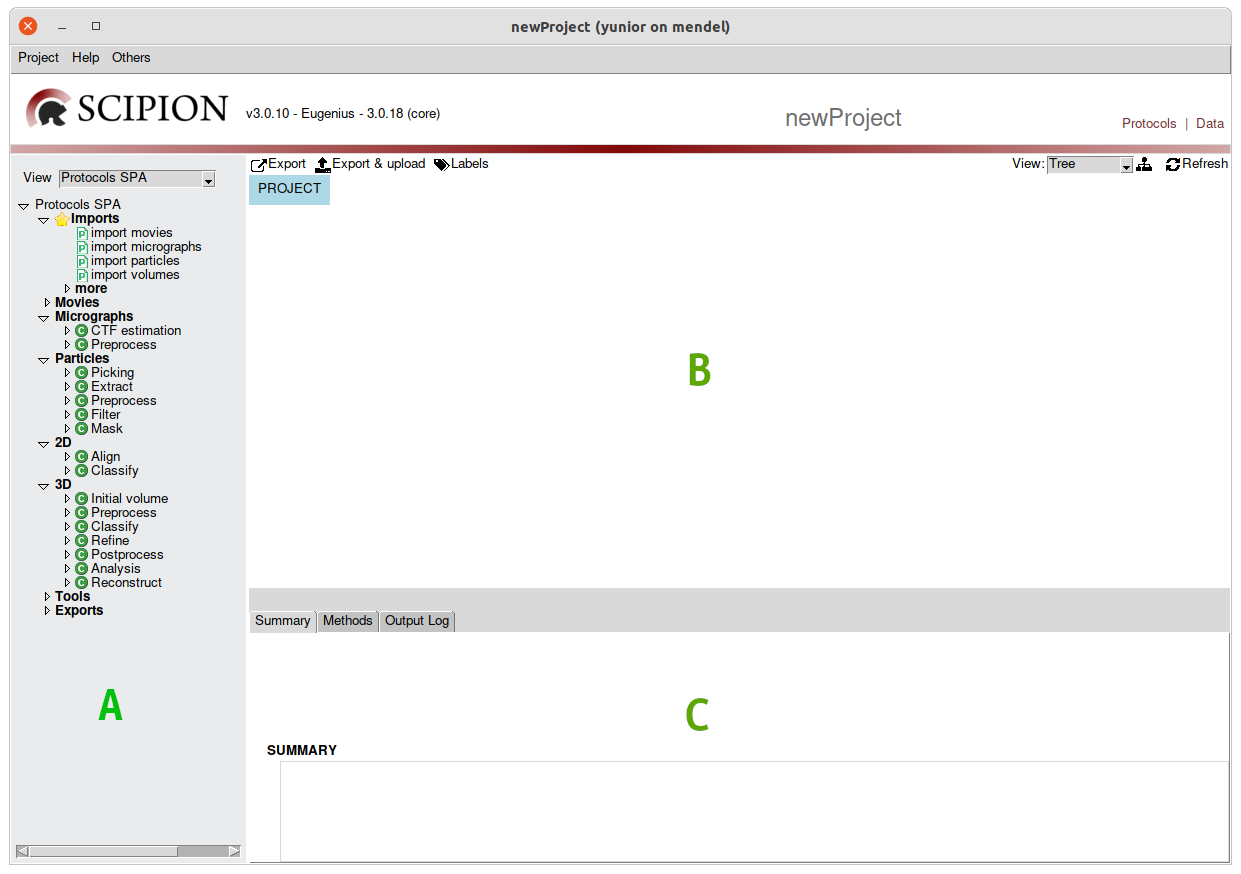
Fig. 2 Figure 2. New project window showing 3 main sections. Protocols tree (A),
workflow panel (B) and information panel (C).
There are 3 main sections in the projects the Protocols tree, the Workflow panel and the information panel
The protocol’s tree
On the left side on the project window it shows the list of available methods (or protocols) grouped by similarity and sorted by time. This is, the protocols that are listed on the top will most likely be used early in the project than those in the bottom.
Note, that the is a dropdown box on the top. It if the view list. Each view only offers (filters) the available methods for a specific image processing domain. Figure 2 shows the protocols for Single Particle Analysis (SPA).
There are other views available for Tomography, Hybrid modelling, … The views are dynamically populated by each of the installed plugins, so the more plugins you have installed for a specific domain (view) the bigger the tree will be.
If you do not see a protocol listed may be you are not looking at the right view or you are missing the plugin that brings it.
A double click on any of the protocols will add it to your project.
There is a special view names “all” where you can see all the protocols available in your installation grouped by plugin. If any icon there appears grey, then that protocol has an installation issue and cannot be run until you fix it. To know the exact problem try to run it and its validation method should tell you where the problem is.
The workflow panel
The workflow panel shows the all the protocols (boxes) involved in your project connected with straight lines. Two boxes connected indicates that they one of them is, or will be, providing input data for the other. One box could be providing the input for several ones therefore, the shape of the workflow could stop being linear quite easily and become to be more like an “inverted tree”.
On the top-left of the workflow you can see a dynamic toolbar offering most common actions available for the current selection.
Single selection can be done by clicking on any of the boxes and the box will be highlighted with a black, thicker frame. Input lines of the selected protocol will turn thicker and darker. Output lines will turn thicker too but this time line will become dark red.
For multiple selection hold “Control key” while clicking on the desired boxes.
Any box can be dragged to any location by left-clicking on the box and holding the mouse button while moving the mouse. Dragging will finish once left mouse button is lifted.
The workflow panel will show and horizontal and vertical scrollbars when the content do not fit in the visible area. Scroll bars can be used to move to non visible areas of the workflow. Mouse-wheel can be used to scroll vertically over the workflow and “Control + mouse wheel” will activate the horizontal scrolling.
Zooming in and out is also possible when using the mouse-wheel when shift key is pressed. When the workflow grows
On the top right of this panel you can find, from left to right: the “view” drop down list, the “Re-organize” button and the “Refresh” button. The “view” list offers 3 different ways to display the workflow:
“Tree” (default): graph like detail view of the protocols and its details
“Tree - small”: Similar to “Tree” but boxes are much smaller only with the protocol identifier (integer).
“List”: Will display a list of protocols, loosing the “flow” aspect of the tree but sometimes easy to locate protocols.
The “Re-organize” button will reorganize ALL the boxes in the best possible clean distribution possible.
The “Refresh” button will update the status and outputs of those protocol that are “active” (launched, scheduled or running). Scipion automatically does this refresh regularly, increasing the refresh interval is there is no activity detected (5”, 10”, 20”, …) up to 30 minutes.
At this point we will begin to build our processing workflow based on the protocols provided by Scipion.
Adding a protocol
To the left panel, different reconstruction tasks related to Single Particle Analysis (SPA) are listed. The tree menu is loaded from a configuration file where protocols are grouped according to base classes, e.g.: Micrographs Preprocess category displays ProtPreprocessMicrographs protocols. A protocol is a processing task that involves the execution of several steps and can be associated to different workflows, e.g.: SPA or Random Conical Tilt (RCT).
To add a protocol, you would just search for it within the tree and
double-click on it. When you do this, a form will appear with the parameters
that will need to be configured for the protocol execution. The following figure
shows the protocol form Import Particles.
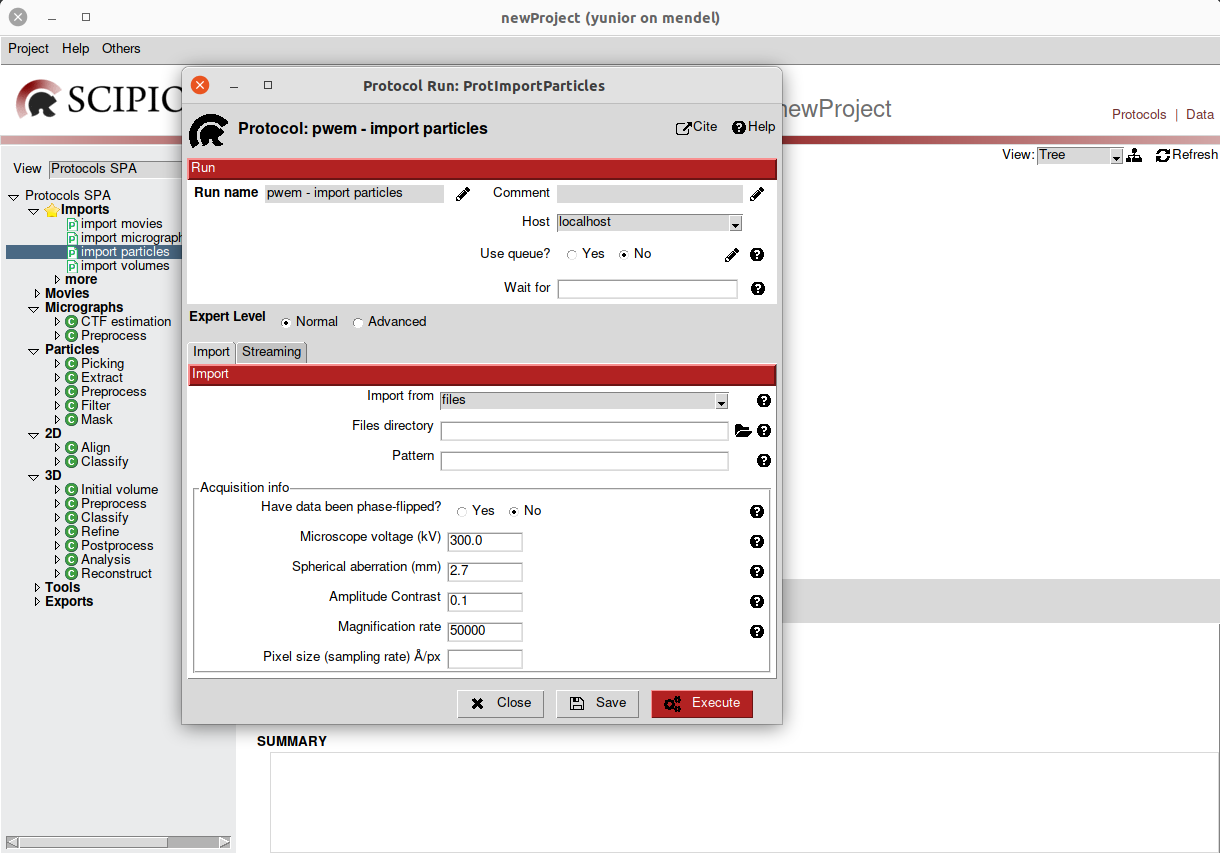
Fig. 3 Figure 3. Import particles protocol
Once all its parameters have been configured, we would proceed to its execution
by pressing the Execute button. After this, the protocol will be shown as
a box in the right panel (Fig 4.).
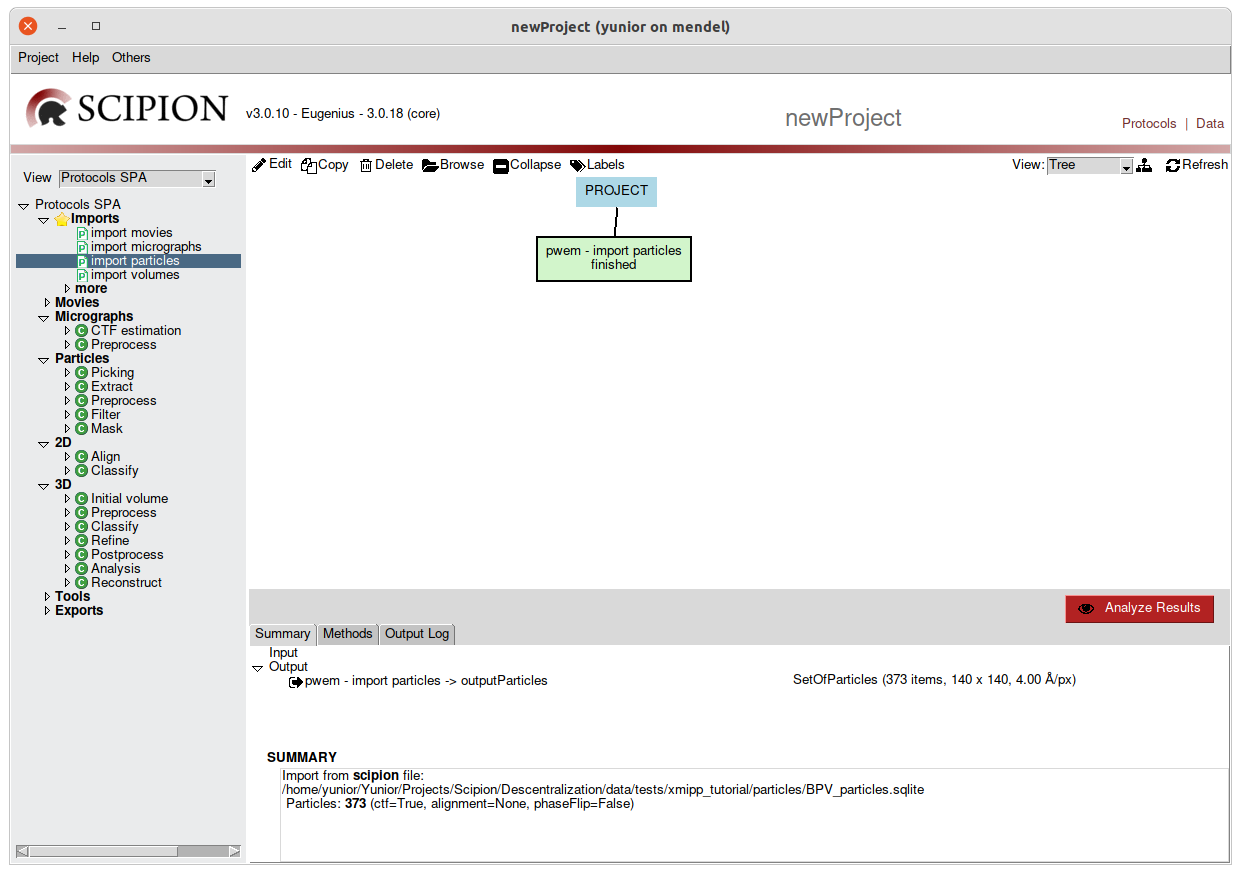
Fig. 4 Figure 4. Executing a protocol
To the right the sequence of protocols executed by the user and its state (running, finished, aborted) is listed. We can visualize it using list or tree views. Starting from Scipion version 1.1 it is possible to create labels associated with different protocols. You can find more details about labels here.
Due to the large number of protocols that exist in Scipion, searching the tree
in the left pane is a bit difficult. Another way to add a protocol to our
workflow is by using the protocol browser which is accessed by pressing
Ctrl-F. It would only be enough to write a pattern of the
protocol that we want to insert, and the browser will filter for all
the protocols installed in Scipion (Fig. 5). After that, it would
only be enough to select the protocol we are looking for.

Fig. 5 Figure 5. Scipion protocol browser
Copying a protocol
We can create copies of one or more protocols(to rerun its) that are in our workflow. It
would only be enough to mark with a click or several protocols with Ctrl-click
and choose the Copy option from the task bar that is located above the right
panel(Fig. 4). If only one protocol is selected, when making the copy, its form will
open which we can execute or just save. In case of selecting more than one
protocol, when doing Copy, all the selected protocols will be copied and they
will be shown in Save state (Fig 6).
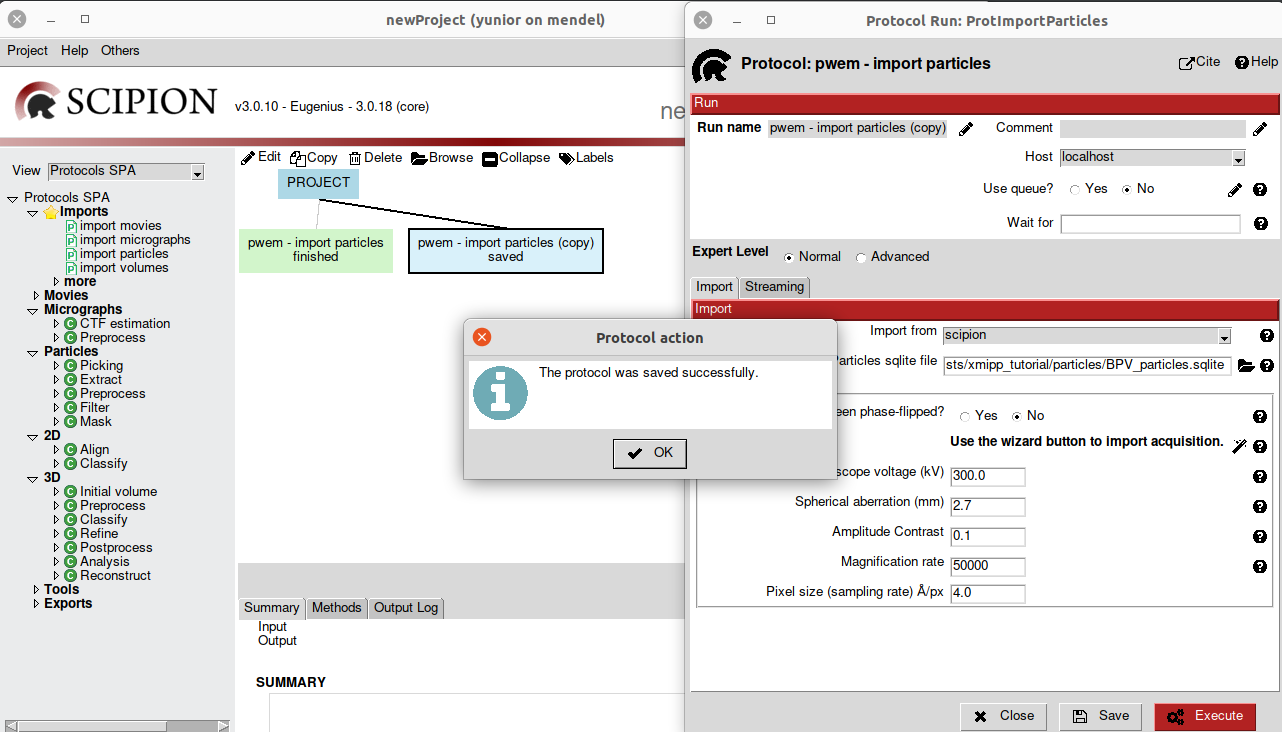
Fig. 6 Figure 6. Saving a protocol
Removing a protocol
Also we can delete one or more protocols from de workflow. It would only be enough to select the protocols to delete and choose the delete option from the taskbar. Before executing this action, Scipion will ask for a confirmation of the operation (Fig. 7).
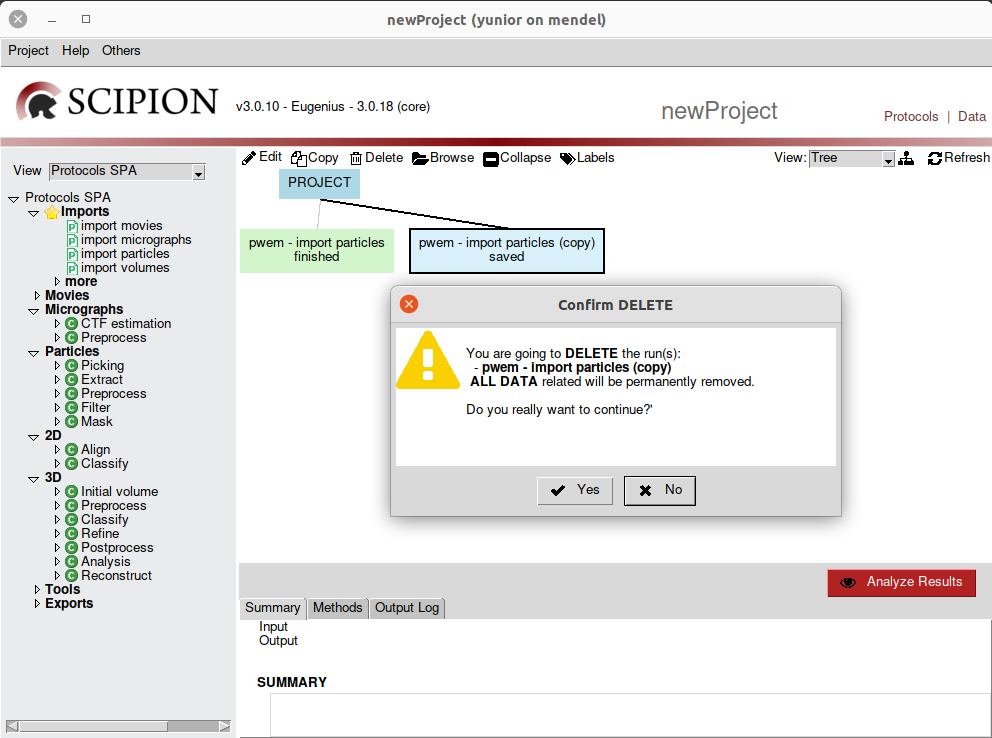
Fig. 7 Figure 7. Removing a protocol
Note
These options and others can also be found by right-click on a
protocol (Fig. 8).
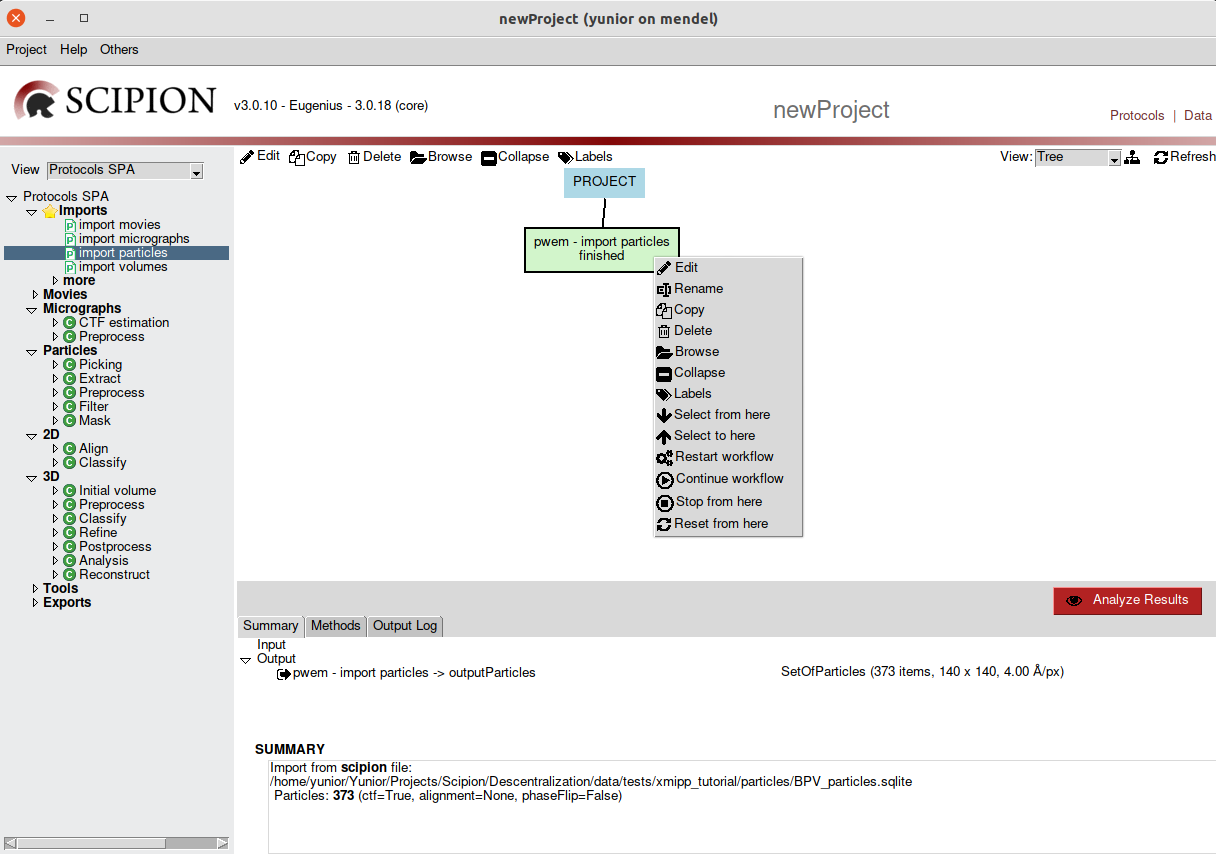
Fig. 8 Figure 8. Protocol options
Locating a protocol
When projects become big it is normal to “loose a protocol”. You can use the “List” view and sort by columns to try to locate it of you can use the “locate protocol” window. Its shortcut is “Control + l” (L not I) and will list all the protocols contained in the project. The list could be filter to help you locate the “lost protocol”. Once found, a double click will select the protocol in the panel and scroll up, down, left, right the workflow panel to make it visible.
Analyzing Results
Some graphical viewers allow the visualization of the results of the protocols
for later analysis.
Bottom right panel displays information for the selected run, such as inputs
and outputs, execution logs or documentation.
To visualize the outputs of a protocol, Scipion provides the Analyze Results
button. Once it is clicked on, the corresponding viewer for the output object
will open (Fig. 9). This example shows a set of particles.
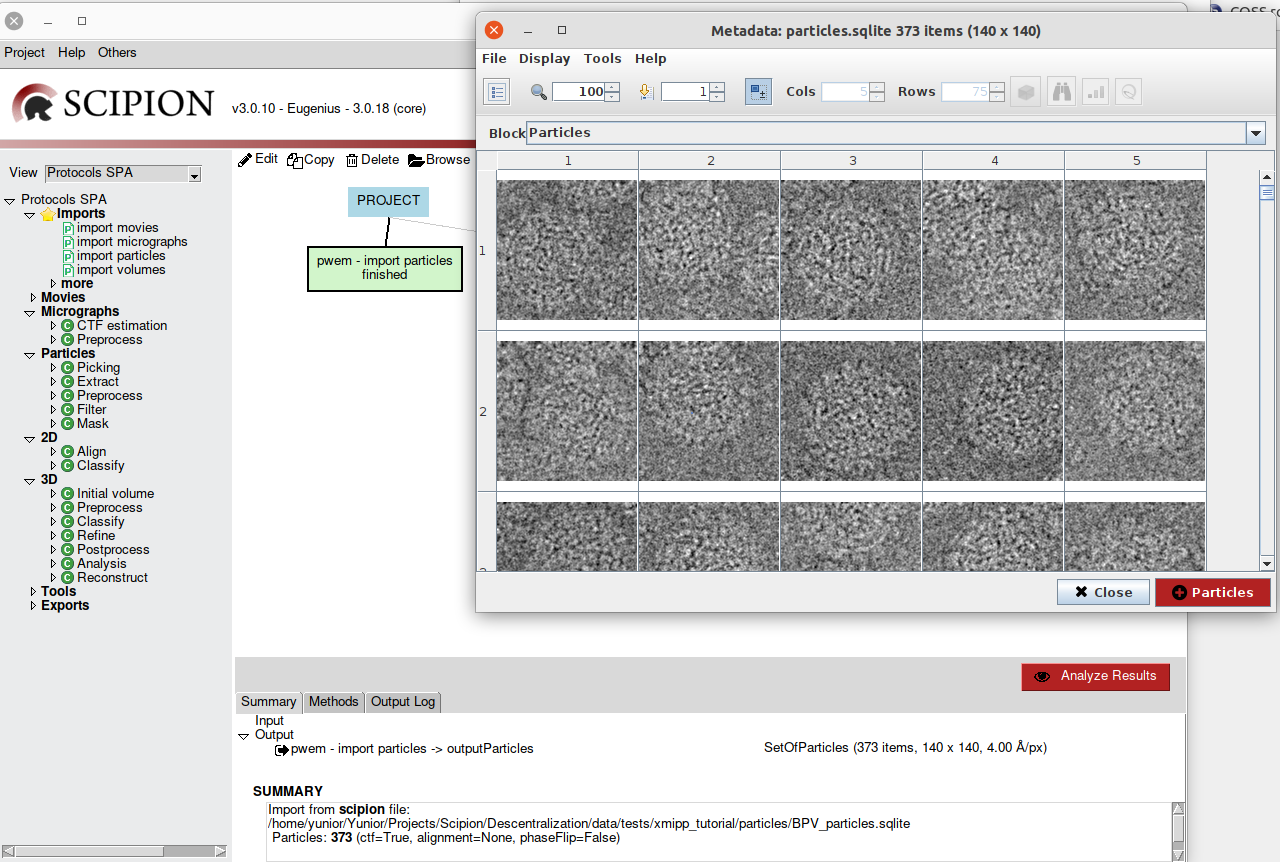
Fig. 9 Figure 9. Analize Results
Another way to view a protocol output is by Right-click on it. The capable
viewers of opening the type of object in question will then appear.
All you have to do is choose one of them and that output will be displayed (Fig. 10).
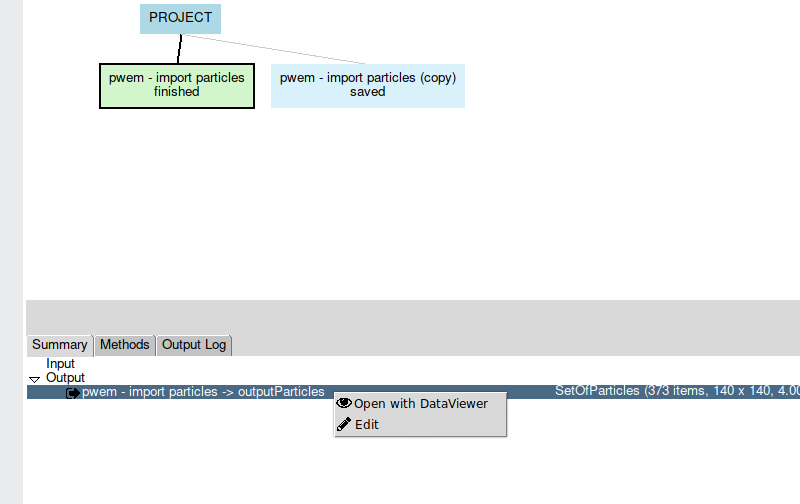
Fig. 10 Figure 10. Viewer list
Schedule protocol
Sometimes we need a protocol to finish its execution to be able to launch another protocol. Scipion protocol forms have a parameter called “Schedule protocol after” (Fig. 11) in which you can specify one or more protocols (protocols IDs separated by a comma).This protocol starts after the input protocols in the list are finished. This function will allow you to “schedule” many runs that will be executed after each other.
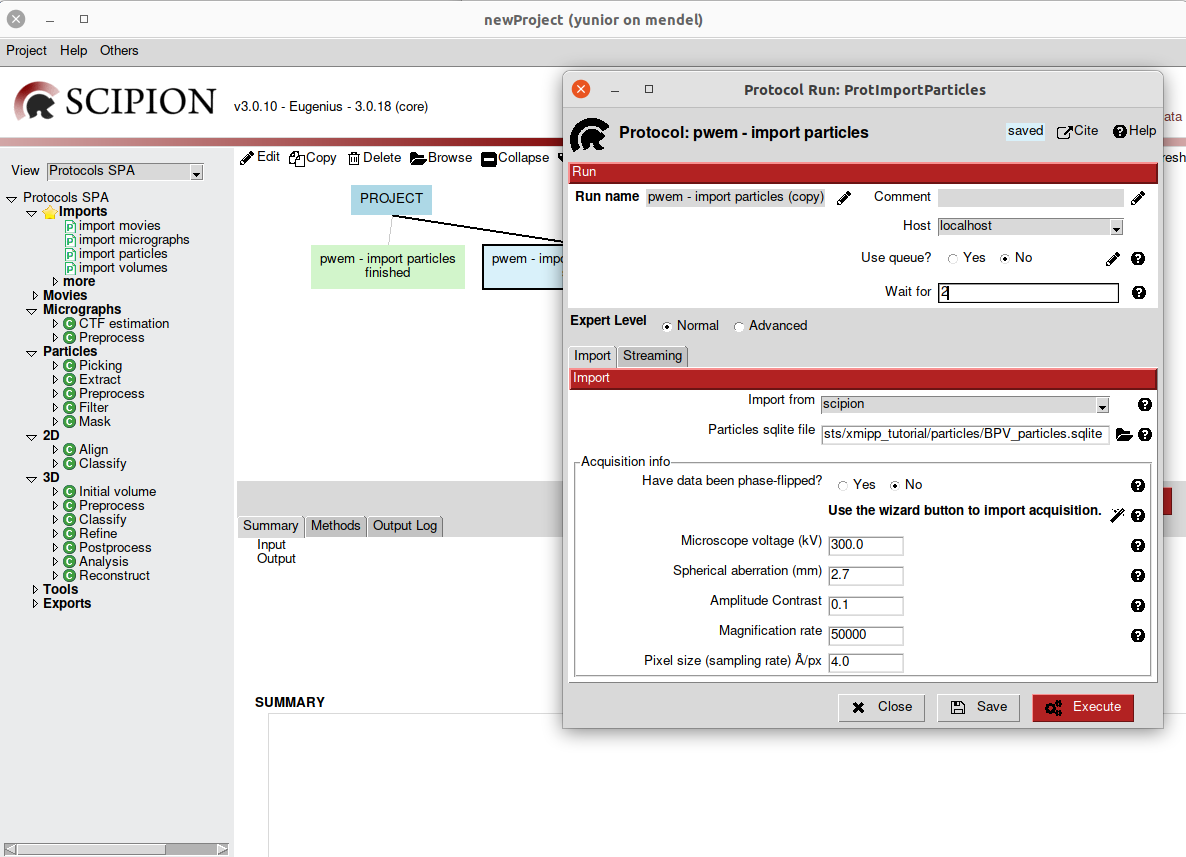
Fig. 11 Figure 10. Prerequisites parameter
To better familiarize ourselves with the Scipion GUI, we will use two more
complex projects. More specifically, for this tutorial we registered projects
TestSpiderWorkflow and TestXmippWorkflow for illustrative purposes (running scipion tests tests.em.workflows.test_workflow_spiderMDA and
pyworkflow.tests.em.workflows.test_workflow_xmipp).
Spider Workflow
If we open TestSpiderWorkflow project GUI is loaded(Fig 9).

Fig. 12 Figure 12. Project GUI in Protocols Mode
If we switch to Data mode (top right), then left panel displays EM objects registered for each type and right panel displays project data tree, with protocol output objects as nodes and edges towards objects used as input. Bottom right panel displays information for the selected item, that can be opened using double click. This mode allows us to track image processing emphasizing on data handling.
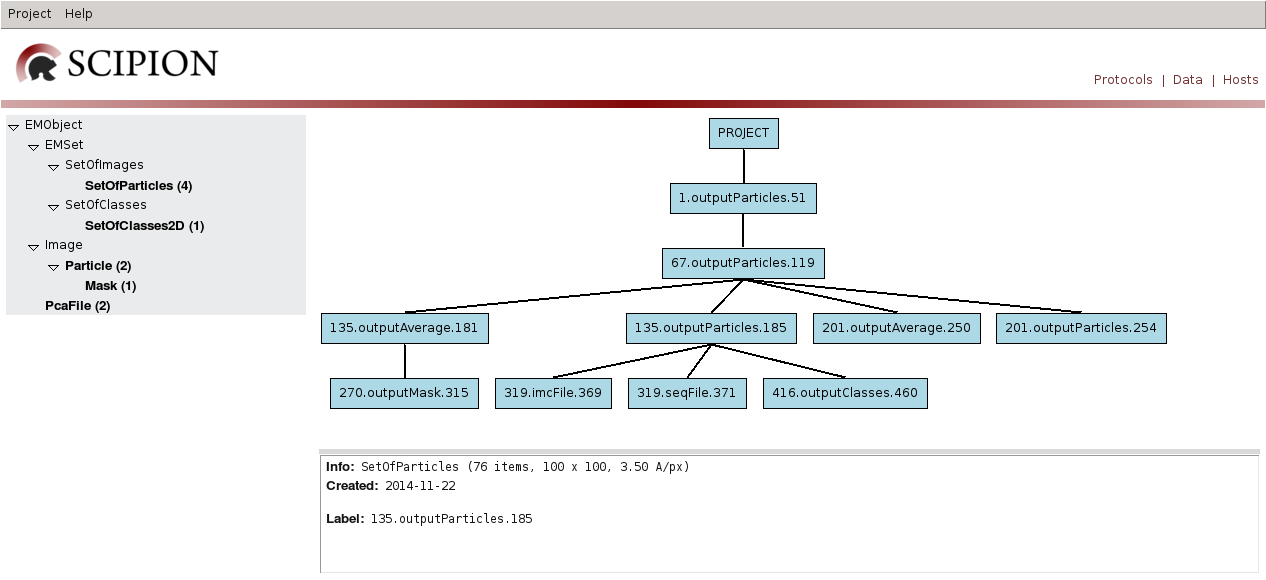
Fig. 13 Figure 13. Project GUI in Data Mode
TestSpiderWorkflow project imports a set of particles, preprocess and aligns them to finally use it as input for different 2D classification algorithms. If we open filter particles protocol (using edit) the following form is displayed:

Fig. 14 Figure 14. Filter Particles Protocol Form
Protocol provides cite references and help util to introduce user on the subject (Fig. 15-16). Form possess two sections: Run and Input. Run section is common to all protocols and allows the user to configure run label and comments (to personalize runs, Fig. 14); execution mode (restart or resume), host, and threads or MPI. Many image processing tasks are computer expensive so they need to be run on specific hosts, using queue system and parallel processing. Parallelization can be supported by underneath algorithm or enabled for protocols with independent steps.
Input section allows to specify input parameters for the task, like input particles or filter type. A brief description is provided for all of them (using help button) and for some a Search GUI to select input object (Fig. 14) or a wizard GUI (through eye button). Parameters are showed considering expert level selected (Normal, Advanced or Expert).

Fig. 15 Figure 15. Protocol Cite
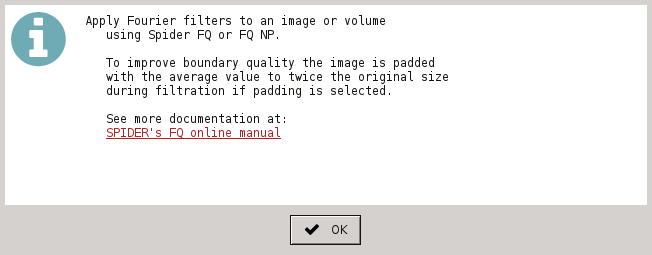
Fig. 16 Figure 16. Protocol Help
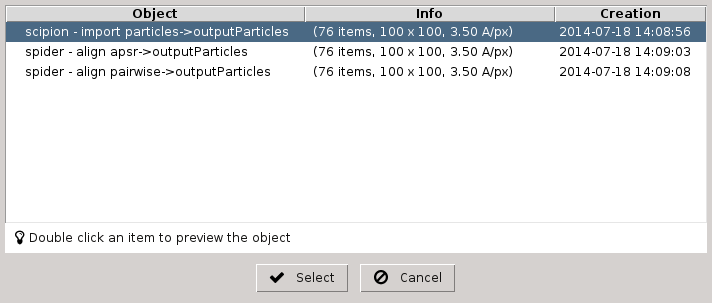
Fig. 17 Figure 17. List of SetOfParticles objects registered
We can visualize filtered particles using “Analyze Results” (Fig. 18). ShowJ viewer is the default viewer for most of Scipion objects, like images, volumes, sets of images, classes, etc. It can display data in gallery and table modes and navigate trough different blocks of data. Also load single images, create subsets, etc. See ShowJ for more detail. In this project we use it to refine output from a 2D classification algorithm.
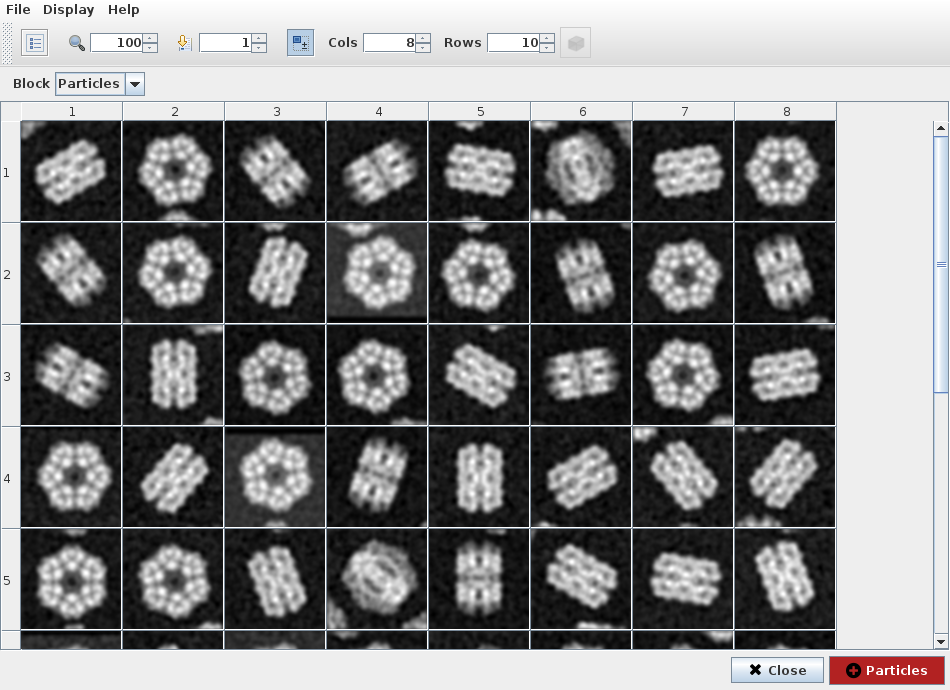
Fig. 18 Figure 18. ShowJ displaying filtered particles
If we select 2D classification protocol spider-classify kmeans and
open output classes, we can see representative particle for each class
(Fig. 19). Third and fourth items seemed very similar so we can disable
fourth item and create a subset containing only remaining classes. This
operation registers a subset protocol with this classes as input and the
set of classes with enabled items as output.

Fig. 19 Figure 19. ShowJ displaying a SetOfClasses
Xmipp Workflow
If you open TestXmippWorkflow the following project GUI is displayed (Fig. 20):
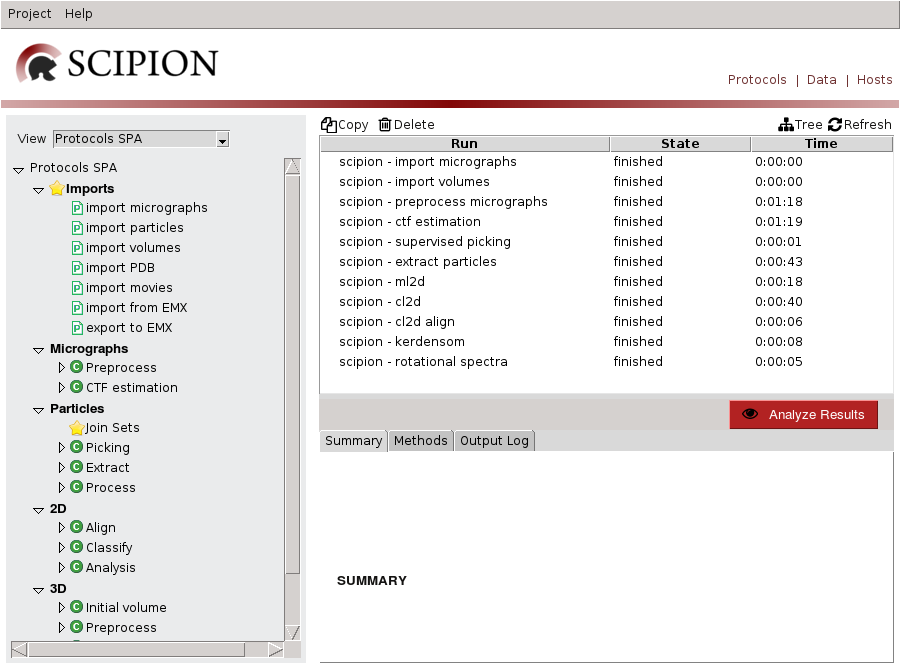
Fig. 20 Figure 20. TestXmippWorkflow Project GUI
This project imports a set of micrographs (eg: Fig. 21), reduce its image size using downsample and estimates their CTF. Then, picks particles from micrographs and extracts particles to use it as input for alignment and classification algorithms like cl2d, ml2d, kendersom or rotational spectra. We use it to illustrate CTF and particle picking GUIs.
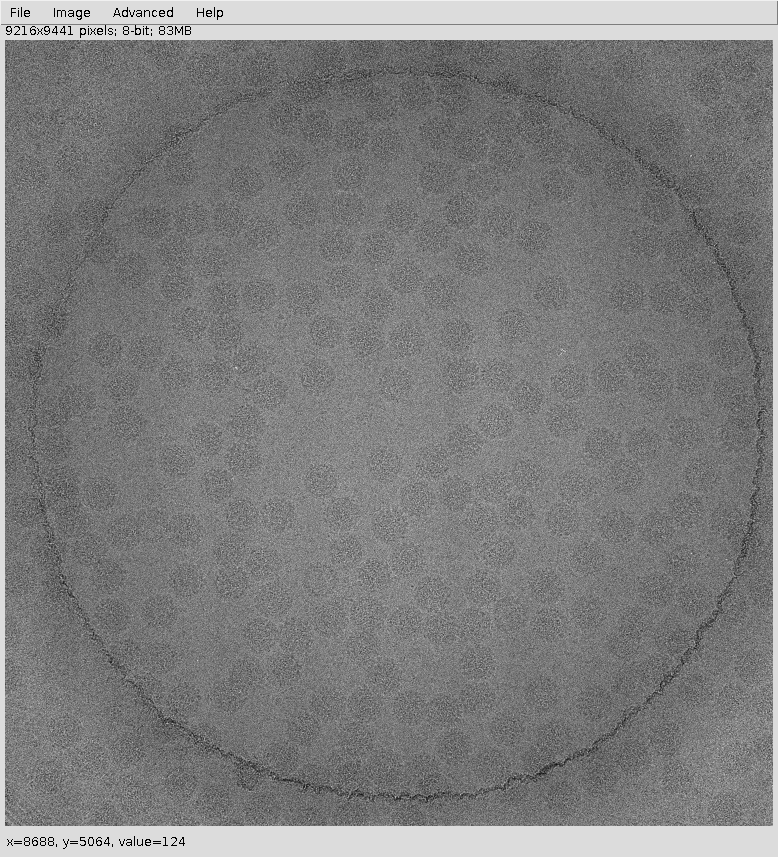
Fig. 21 Figure 21. ShowJ displaying input micrograph with “gaussian blur” filter applied
ShowJ GUI for single images is displayed above (see Showj)
Screen micrographs produces this output:
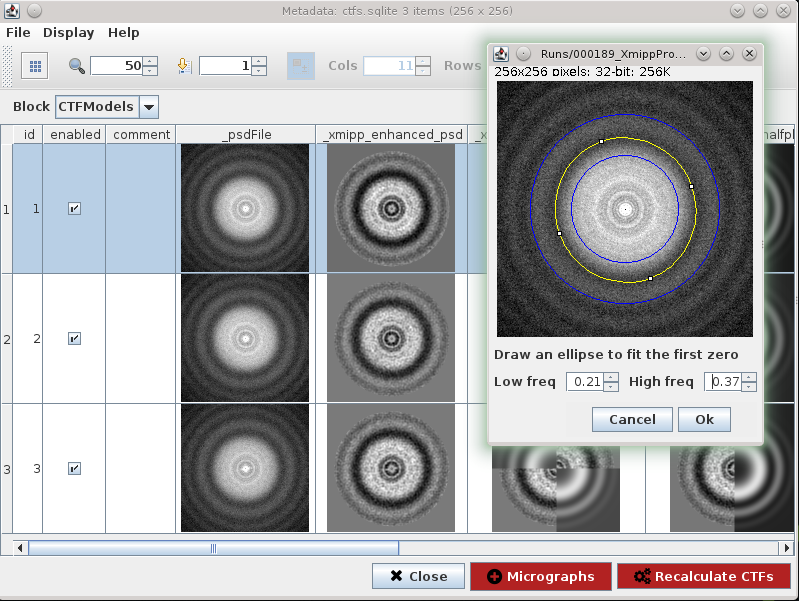
Fig. 22 Figure 22. CTF Recalculate Wizard
We can use CTF wizard to redefine input parameters to recalculate CTF on specific micrographs. Recalculate CTFs will register a new protocol that receives this SetOfCTF as input and creates an output set with CTFs updated.
Particle picking can be done in Scipion using Xmipp, Eman, Bsoft, etc. In this tutorial we chose Xmipp Particle Picker, see Fig. 23.
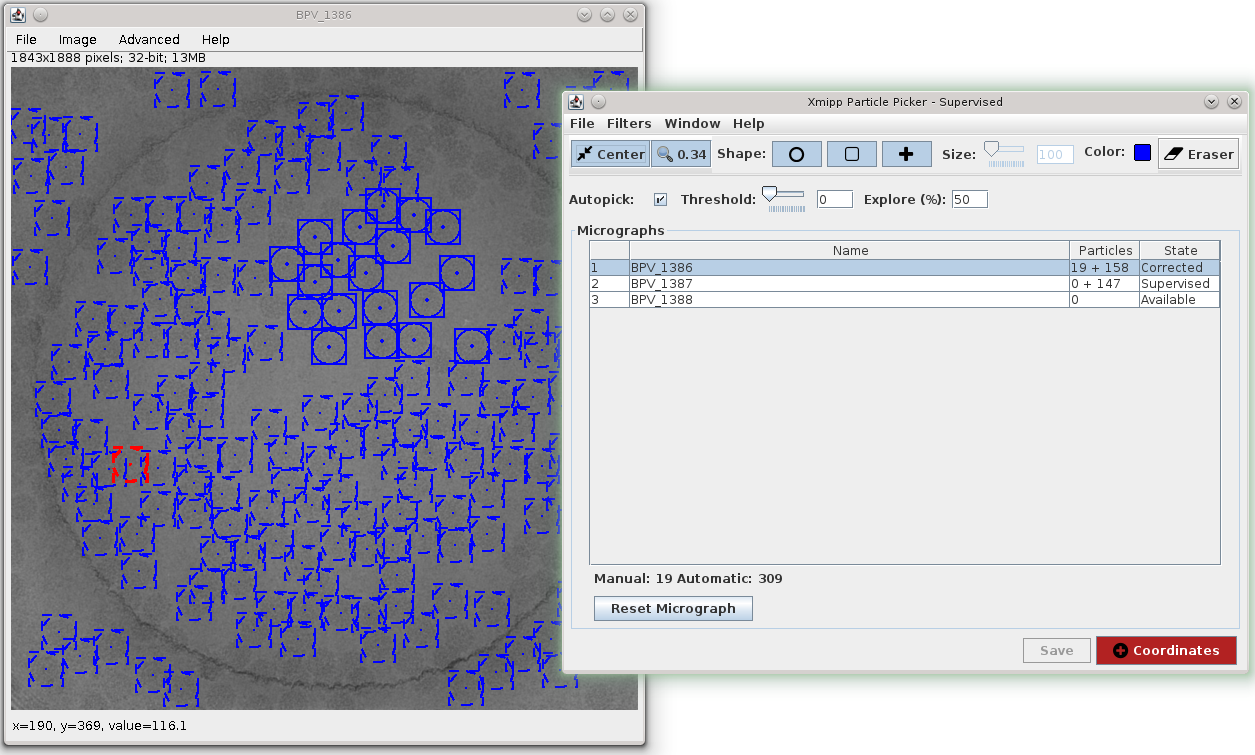
Fig. 23 Figure 23. Xmipp Particle Picker GUI
The Xmipp picker allows us to iterate over the micrographs to pick particles, see Picker. After we have done some manual/supervised picking and feel confident with the results we register output coordinates into Scipion using Add Coordinates button.
